

09 - The Van challenges me
The Window Nightmare
I'd already been struggling with the old on-board battery and the ignition distributor. A few rust spots had
been worrying me. And I don't even want to get started on the registration again. But now the Bulli was
really going to give me a hard time. I'd noticed on several occasions that water kept collecting inside. But
for a long time I couldn't work out where it was getting in. It was only when a sudden downpour caught me by
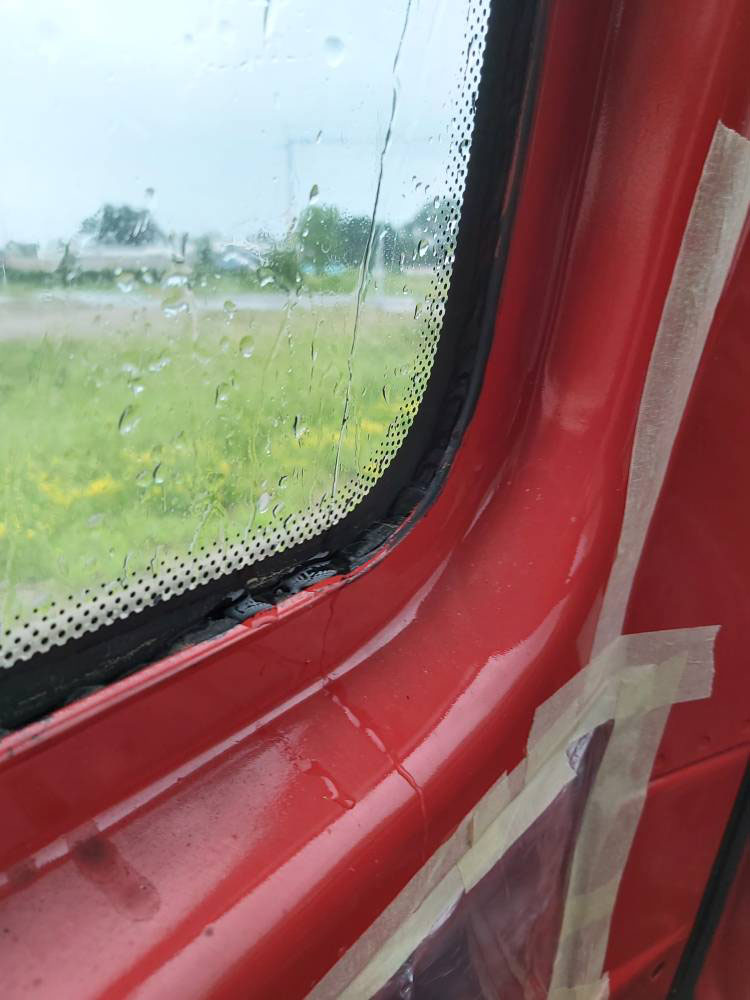
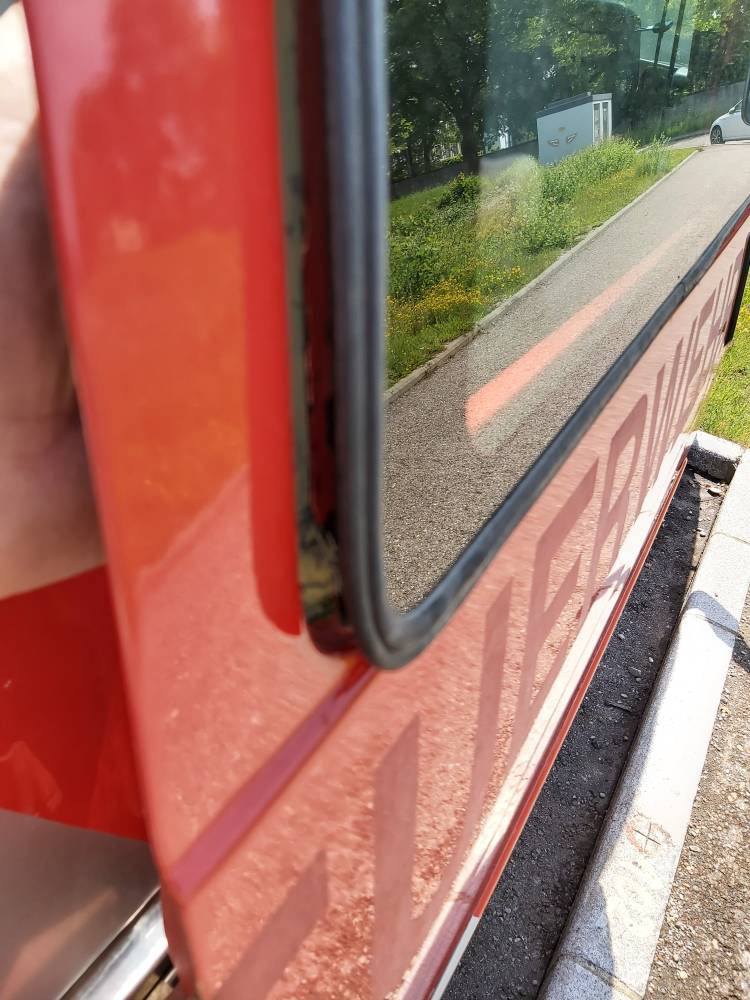
surprise right next to the van that I found the leak. The seal on one of the side windows was clearly no longer
working properly. My first thought was that I could easily reseal it with some black silicone. But I never got
round to it.
Just a few days later, I closed the right-hand sliding door and heard a strange noise coming from the side window.
No, it hadn't cracked. But it wasn't much better than that either. At the bottom left, the bonding
between the window and the bodywork had come loose and the window was threatening to fall out. Silicone
wasn't going to help here. A professional was needed.
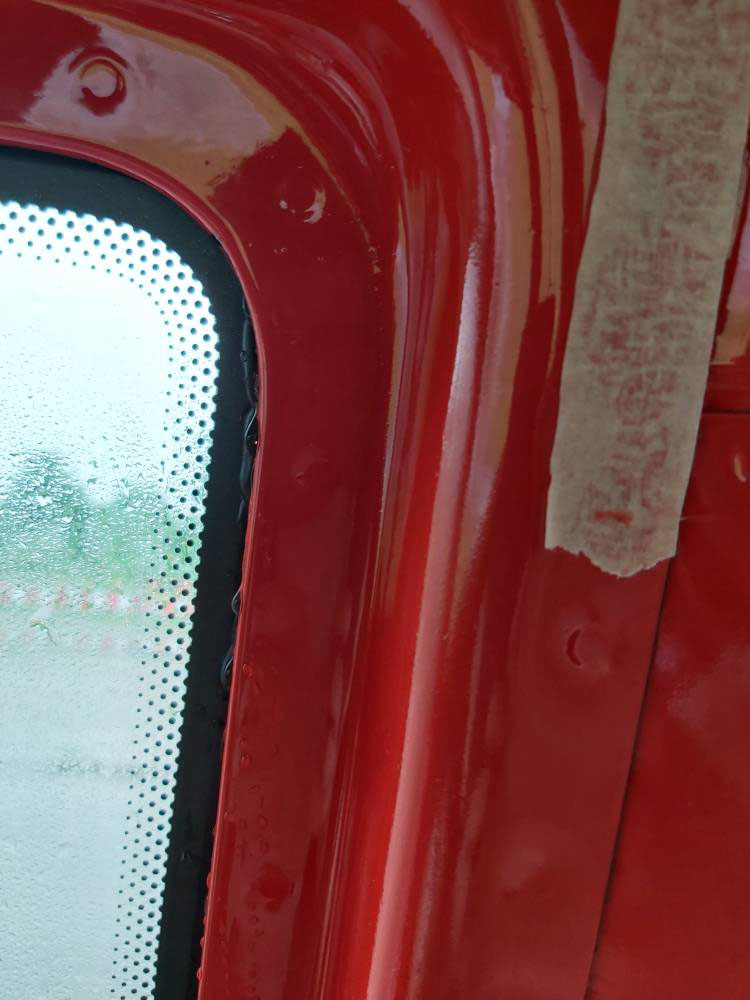
junited Autoglas had a slot available
at short notice, so the van was in their yard shortly afterwards. Although the mechanic couldn't promise that
they'd be able to remove the windows without damaging them and thus reuse them, I had all the windows except
the windscreen re-bonded just to be on the safe side. Now I had a 30-year watertightness guarantee again. How
reassuring.
The Battle with Seats & Floor Covering
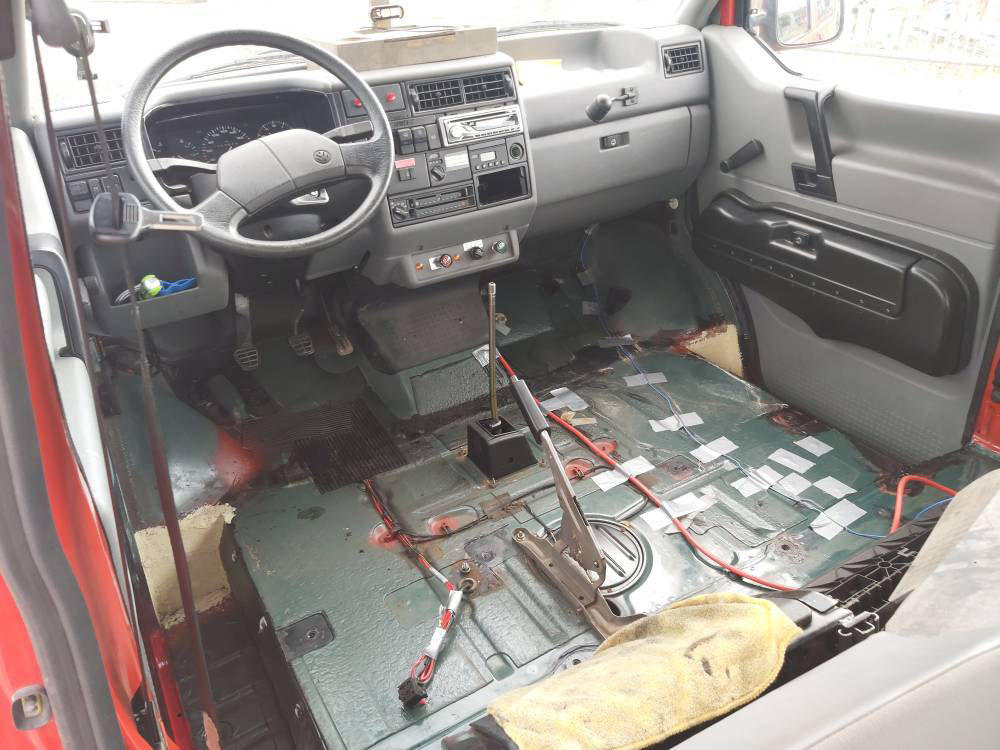
In order to start the conversion, it was essential to route the supply cable from the on-board battery and the
control cable from the alternator to the charger for the body battery. The control cable was relatively easy to
route, being only 1.5 mm². Things looked quite different with the 50 mm² supply cable. First of all, a
clear and suitable route from the engine compartment into the interior had to be found. Afterwards, the cables
couldn't simply be left lying around on the floor. Similarly, routing the cables up to the roof and then back
down again wasn't feasible due to the length of the cables. So the cables had to be hidden under the floor
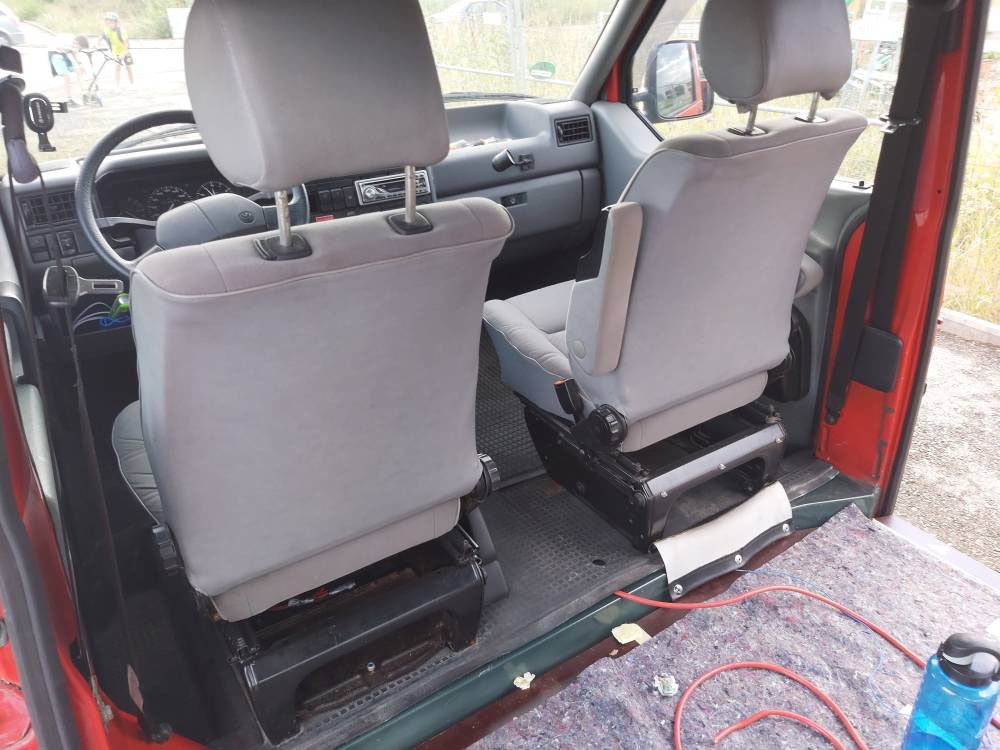
covering in the driver's area. To do this, the seats had to be removed first. Sounds simple, but
unfortunately the bolts proved to be very stubborn.
A wrench was absolutely useless; the bolts were clearly rusted solid. So I got hold of various remedies to loosen
the stuck bolts. Whether it was rust remover, shock freezing or WD40, nothing helped; the bolts simply
wouldn't budge. But I wasn't going to give up that easily. So I literally drowned the bolts in rust
remover and left it to work overnight.
But I hadn't reckoned with the bolts. Not a single thing budged. I was already thinking I'd have to go
back to the garage and rang them in frustration, but the mechanic had a tip for me. I should try using a torque
wrench.
With renewed courage, I headed to the specialist shop to buy a torque wrench. Armed with new equipment and a bit
of determination, I tackled the bolts and, lo and behold, they took pity on me. At last I could remove the seats.
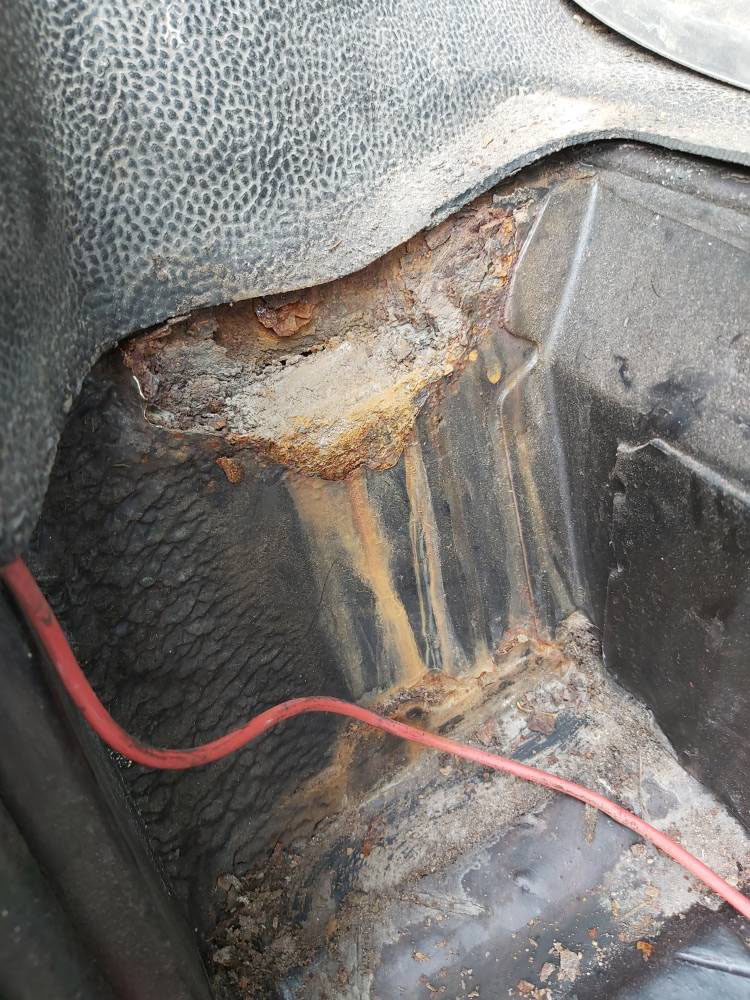
Now I could take out the floor covering and was shocked. Not only was it pretty much ruined, it had also soaked up
a massive amount of water. It was already dripping out as I lifted it out. It was so wet I could easily have wrung
it out. It was no longer any use.
A quick glance showed me, however, that this hadn't caused any damage to the floor panel. The paintwork had
held up. Nevertheless, I had to search online for a new, suitable floor covering and order one. There's so
much to bear in mind. The right model, the correct year of manufacture, left-hand or right-hand drive, long or
short wheelbase, and a single or double seat on the passenger side. Phew, hopefully I haven't forgotten
anything and the floor covering will fit.
As it turned out, I'd thought of everything and the new floor covering fitted perfectly. But there was still
quite a bit to do before that.
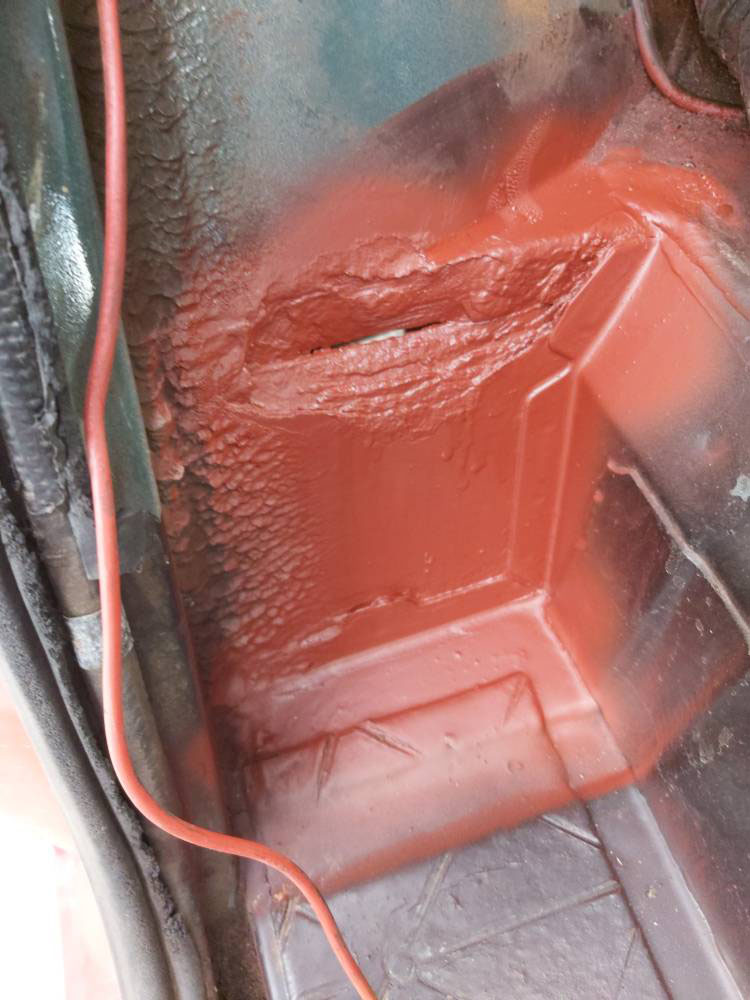
Rust Holes - What a Shock
Unfortunately, removing the floor covering still revealed something terrible. Under the trim on both steps, I
found rust again.
The rust had had plenty of time to eat its way through. Well, what now? As it wasn't a load-bearing
component, just the wheel arch, I wanted to repair it myself. I'd already done some research online about
fixing rust damage. So I thought I could manage it.
The first step, of course, was to remove the rust. With a lot of patience, a wire brush and various wire
attachments for the drill, I worked on the metal until all the rust was gone and the metal was bare. Then I
applied a rust converter. This converts rust - i.e. iron oxide - into iron phosphate through a chemical process.
This stops further oxidation - rusting - and forms a protective layer. This layer also serves as a primer for the
subsequent coating. Once the rust converter had taken effect and was dry, I applied several coats of anti-rust
spray.
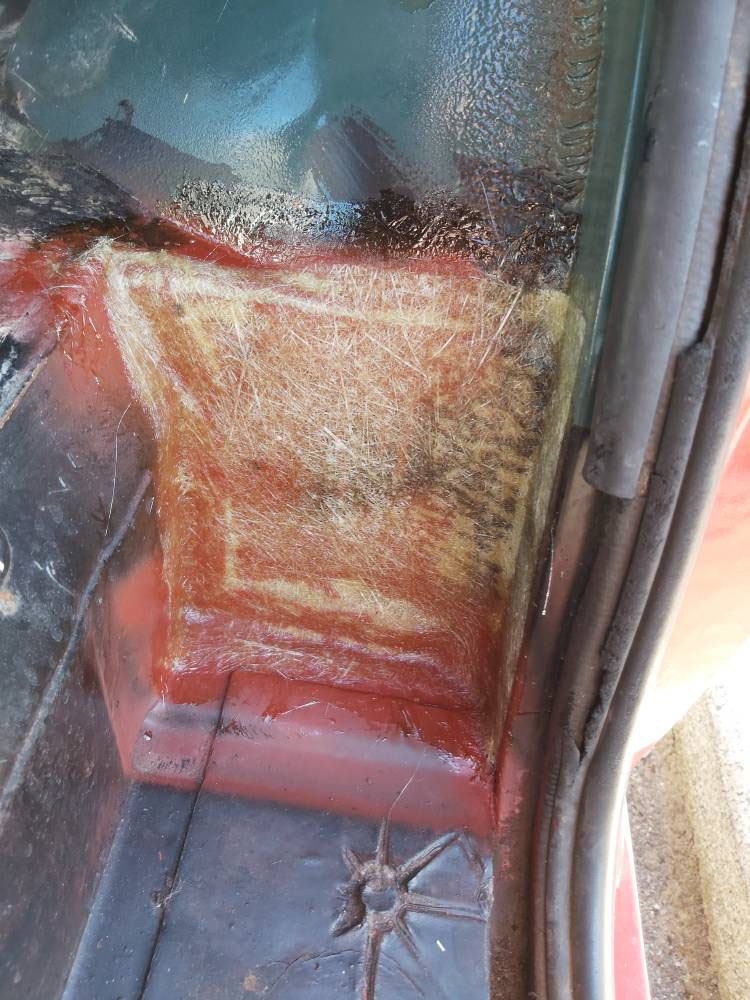
Now all that remained was to seal the holes to prevent moisture from penetrating in future. As I am not familiar
with welding, this method was out of the question. But what is the alternative? A very good and frequently used
option is filling. This is also used for smaller dents. To prevent cracks later on, I wanted to insert a fabric
mesh.
I found the right products at the DIY store: a two-component filler, a suitable filler compound, and fibreglass
mats to cut to size. The first step was to apply a layer of filler as a base. It's important to mix only very
small quantities, as once the hardener is added, you only have about 10 minutes to work with it. I then cut the
fibreglass mats to size and applied them using fresh filler. I made sure the fabric lay flat and cleanly and was
fully covered with filler. A third layer of filler was applied to ensure sufficient strength.
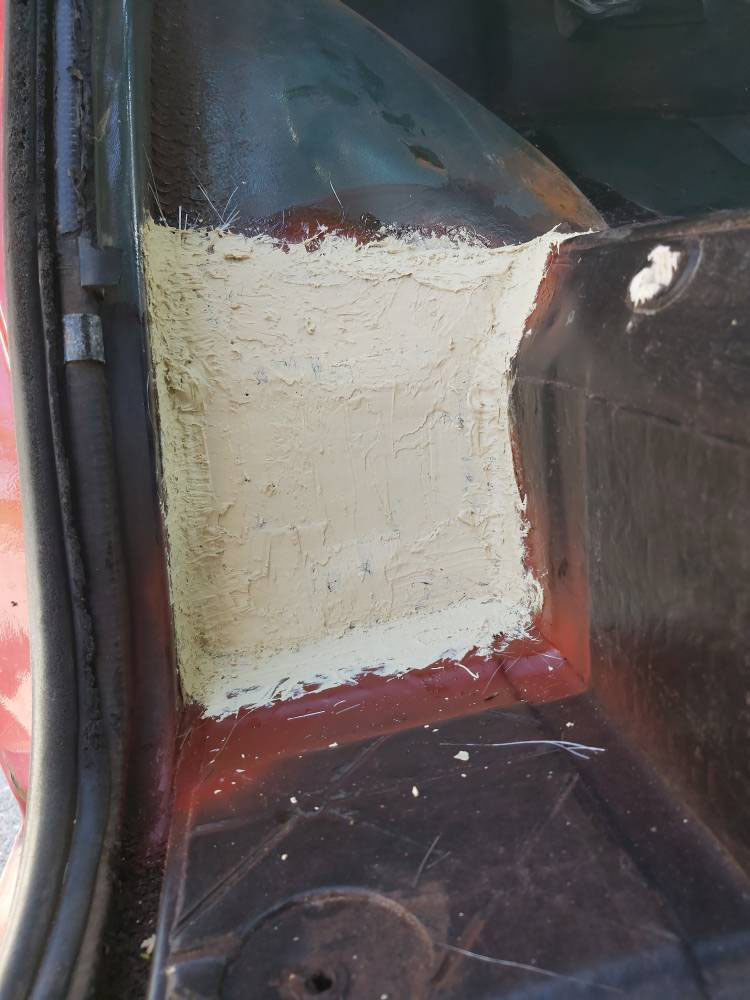
As the two-component filler hardens very quickly, the next steps could be carried out immediately afterwards.
Protection against new rust also had to be provided from the outside. Here, I opted for a bitumen-based underbody
protection. The underbody protection is available in a spray can and is very easy to apply, even in hard-to-reach
areas. Here too, I worked in several layers. As the step trim covers these areas on the inside, I decided not to
apply any paint.
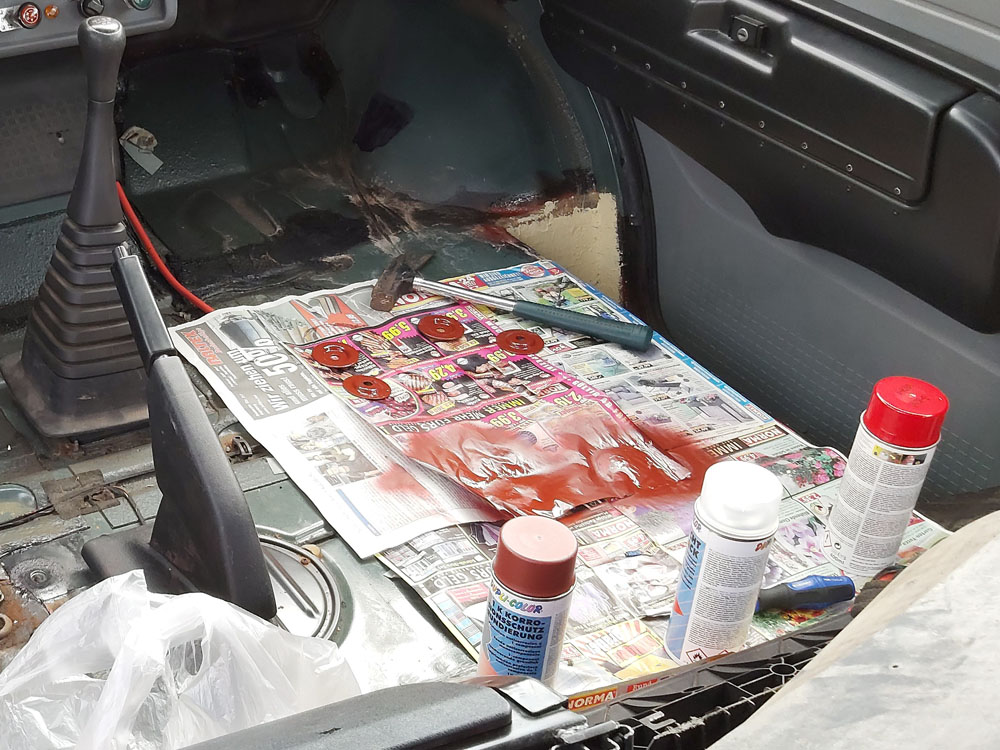
Finish line: Seat Spacers
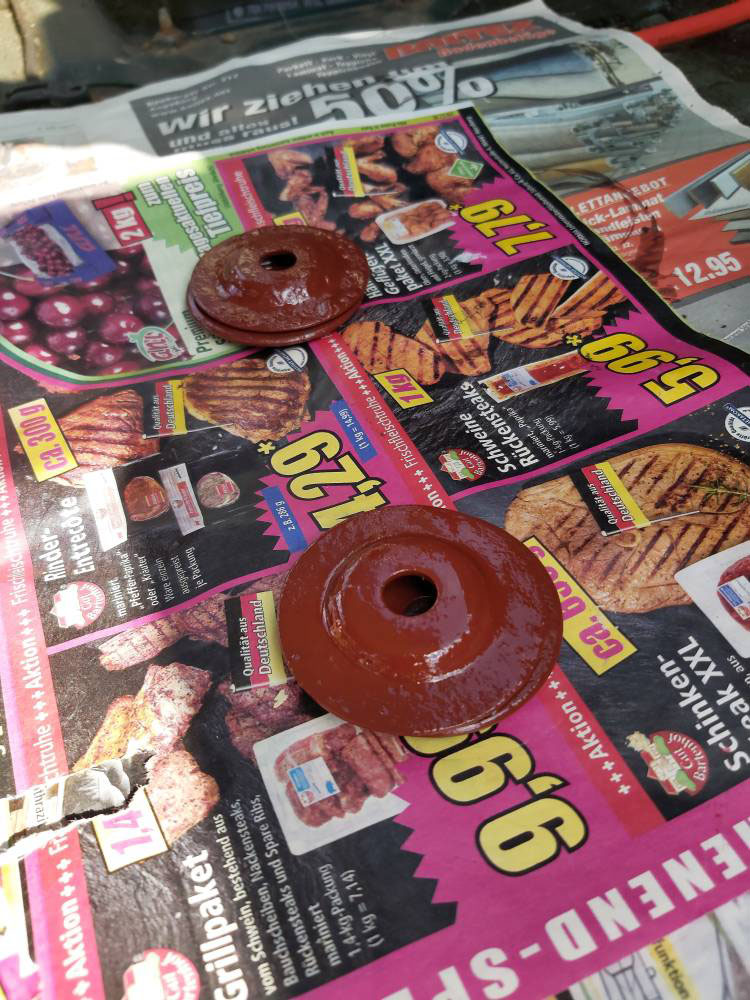
Finally, I turned my attention to the seat spacers. These also showed some signs of rust. The rust was thoroughly
removed and the bare patches were then treated with a rust converter. This was followed by two coats of rust
inhibitor and two further coats of clear varnish. This should provide the spacers with adequate protection against
further rust.
Once all the preparatory work was complete, the new floor covering could be laid. Next came the seats and, last
but not least, the gear lever and handbrake covers.
Comments
Write a comment
Your email address will of course not be published.