

08 - The first Attempts
Dash-Tray with cup holders
Even whilst I was still in the planning stage, I wanted to start work on one or two parts. On the one hand, to
test my skills. On the other hand, this was also necessary for the planning. For example, the height of the bed
had to be adjusted to match the height of the dry-separating toilet. I also had to plan space for the auxiliary
battery and the electrical system. So I decided to start by building a dash-tray, including cup holders, for the
dashboard.
As I am neither a carpenter nor did I have a workshop with the necessary equipment, it was a great piece of
practice. It soon became clear that I would struggle to manage without additional tools. A further difficulty was
that I had to carry out all the work in my small basement room. Especially later on, the lack of space was to
become a real challenge.
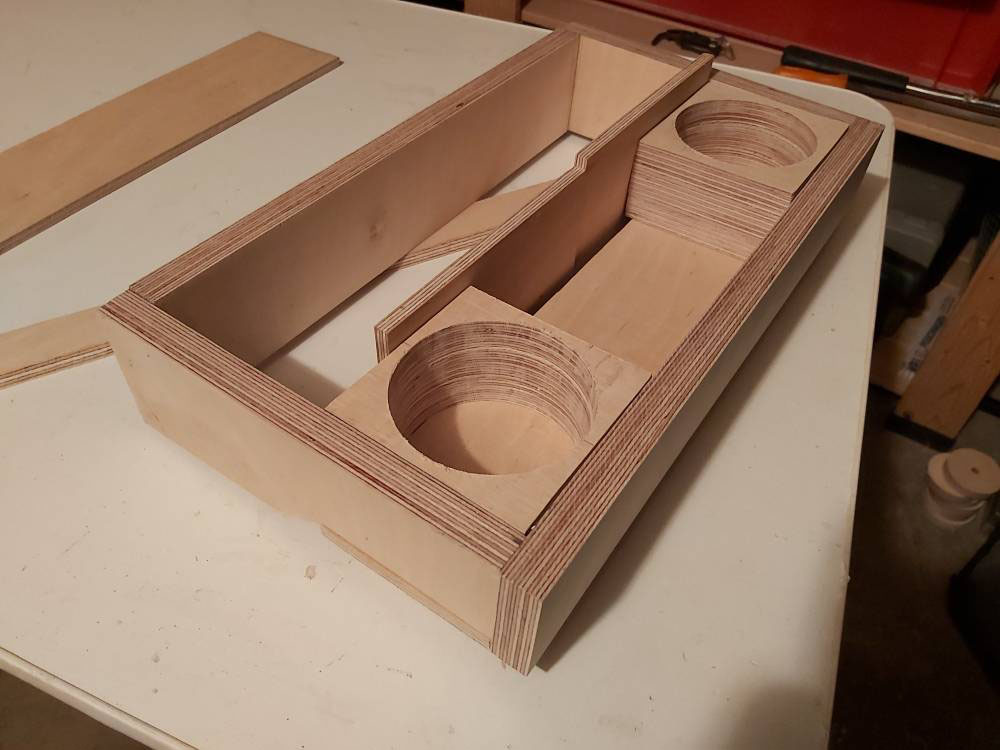
But initially, I approached the task with enthusiasm and, using my modest equipment, began to work on the
individual parts for the dash-tray. Cutting them to size with the jigsaw was still straightforward. Making several
square panels, each with a circular cut-out exactly in the centre and fitting perfectly on top of one another, was
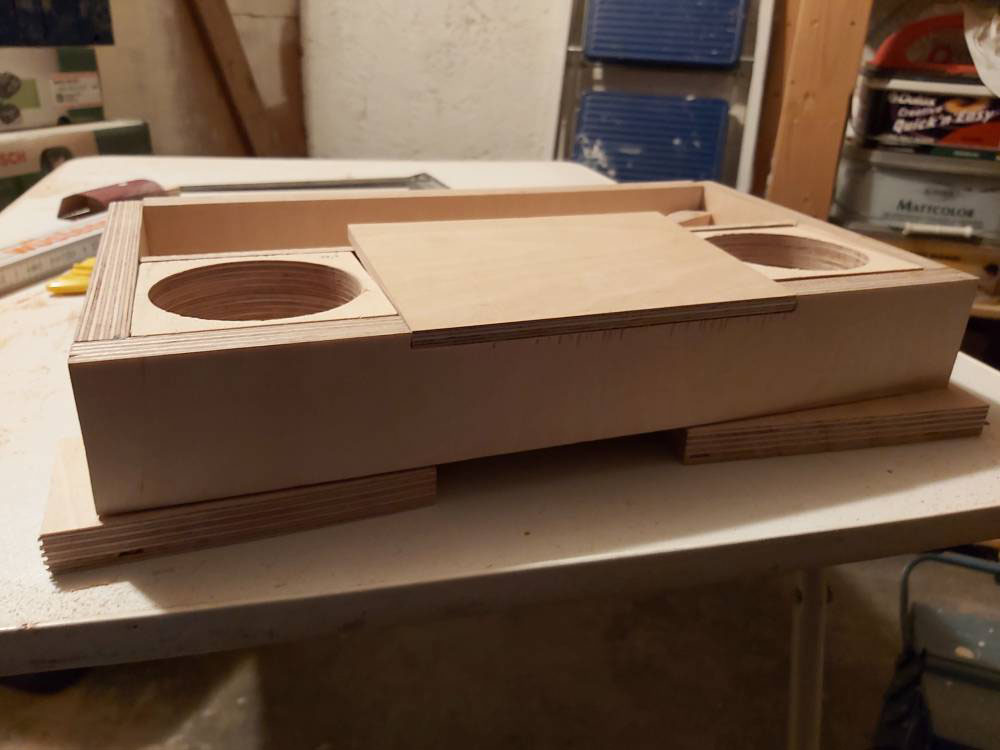
already much more difficult. It wasn't possible without a lot of reworking. I also wanted to include a
compartment with a flap. To do this, however, I had to create a 3mm-deep notch. Here, too, I quickly reached the
limits of what was feasible. At least, if you don't want to spend days fiddling about with a file.
Nevertheless, I managed to produce a decent dash-tray that met my requirements. It even had a built-in USB port
for charging a mobile phone.
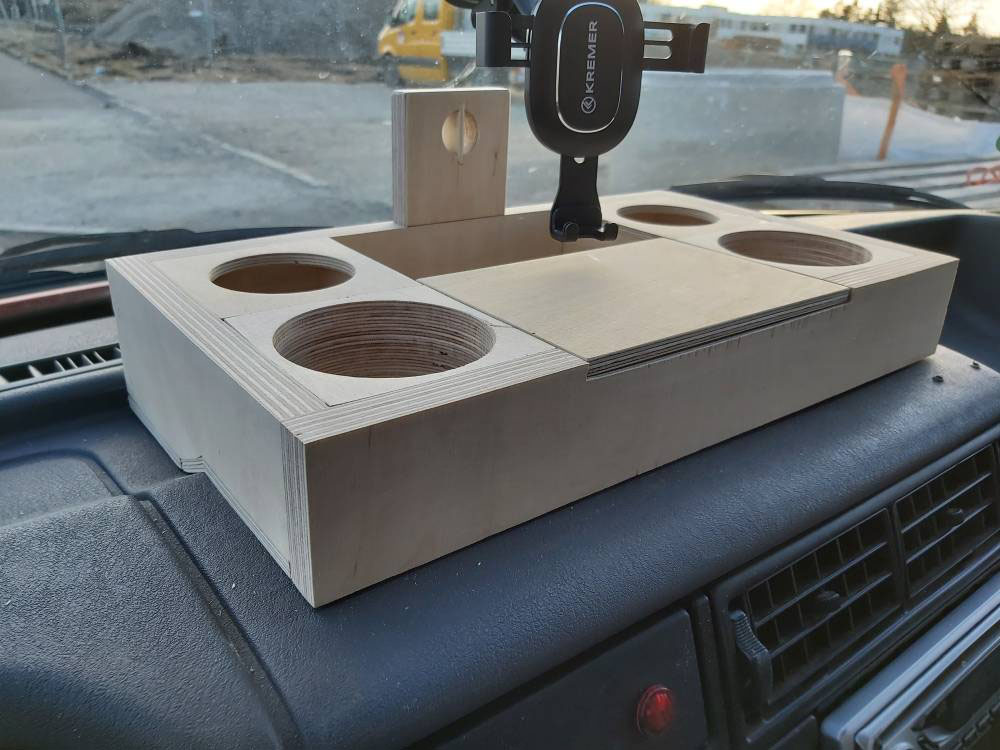
However, this first attempt showed me that I needed to expand my equipment. As I also expected to have to carry
out a lot of work directly on the van, I wanted to rely on cordless tools. So off to the DIY store I went. A
cordless drill/driver, a
cordless jigsaw and a
cordless sander ended up in the shopping
trolley. I also picked up some screw clamps and
clamps, as well as extra drill bits and saw
blades.
As I'd never worked with a router before, I decided to leave it out at first. However, I soon realised that
I'd struggle to get by without one. A router is essential, if only for cutting grooves. So I went out and
bought a router straight away.
The Dry-separation Toilet
Now that my “carpentry workshop” was properly equipped, I was able to make further parts. Next up was
the dry-separation toilet. I'd read about this type of toilet in numerous blogs and was both excited and
sceptical. Most campers have a chemical toilet, which can only be emptied at special stations and usually smells
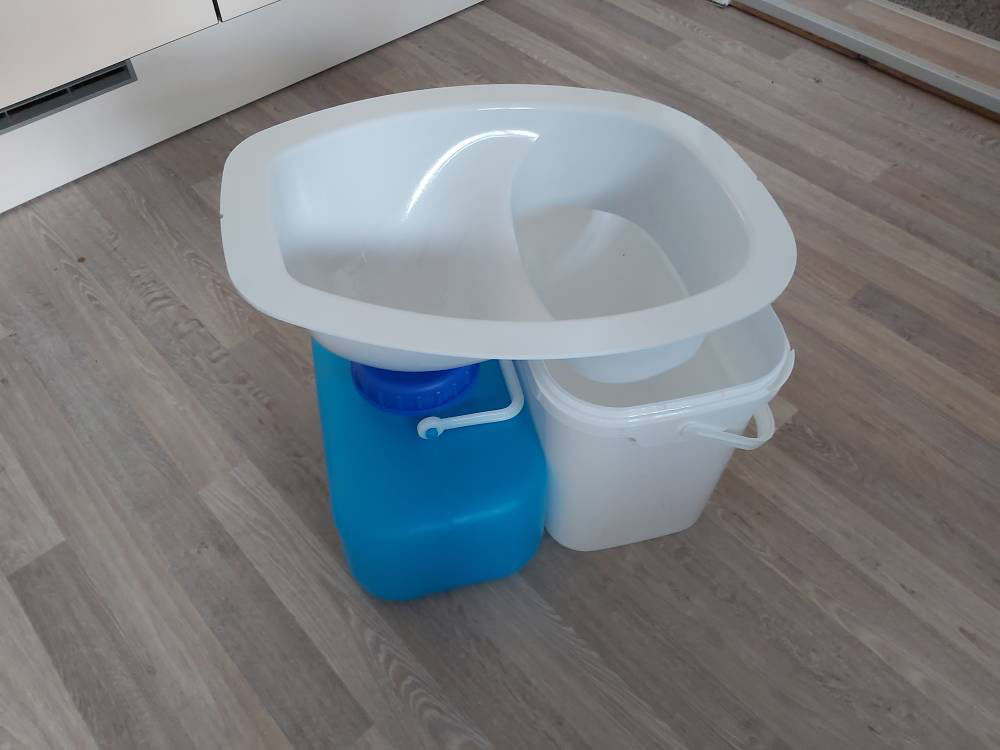
very unpleasant. A dry-separation toilet, on the other hand, uses no chemicals. A special separation insert
reliably separates liquids and solids, collecting them in different containers.
The solid waste ends up in a bucket lined with a bin bag, and the urine in a separate container with an
odour-blocking mechanism. Simply by adding a little litter, the solid waste dries out quickly and no odour is
produced. Once the urine container is full, it can be emptied into any drain or gully. A splash of vinegar helps
to neutralise any odour. Thanks to the bin liner, the solid waste can be disposed of in any standard bin.
The advantages of a dry separation toilet at a glance:
-
Environmentally friendly
Unlike a conventional chemical toilet, the dry separation toilet does not use any chemical additives, relying instead on sustainable litter materials.
-
Resource-efficient
As the name suggests, the dry separation toilet requires no water. This saves this precious resource when you're on the move. It is also particularly useful wherever water is scarce and difficult to obtain.
-
Self-sufficient and portable
The dry separation toilet requires neither a water nor a waste water connection. Consequently, you can enjoy the comfort of a toilet wherever a conventional toilet cannot be installed. As the dimensions can also be very compact, the dry separation toilet is portable and easy to transport.
PLEASE NOTE: You do not need to drive to special disposal points, as you would for a chemical toilet. You simply don't need them 😉.
-
Odourless
The use of litter allows the waste to dry out quickly, thereby preventing odours from forming. As no chemicals are used, there are no unpleasant chemical smells during emptying and cleaning.
As urine consists of 95% water, it does not smell. The unpleasant smell of urine is only caused by deposits such as urine scale and bacteria. Urine scale, in turn, is caused by the addition of pure water, which the dry separation toilet does not use. Bacteria, on the other hand, are introduced by faeces, which is prevented by the strict separation. Therefore, the urine does not smell unpleasant.
-
Easy to use
Thanks to the clean separation of liquids and solids, it is incredibly easy to use. You do your business as usual; the separation insert takes care of the separation all by itself. The urine container is disposed of via the mains drainage system, whilst the solid waste is disposed of in a bin bag via the general waste bin.
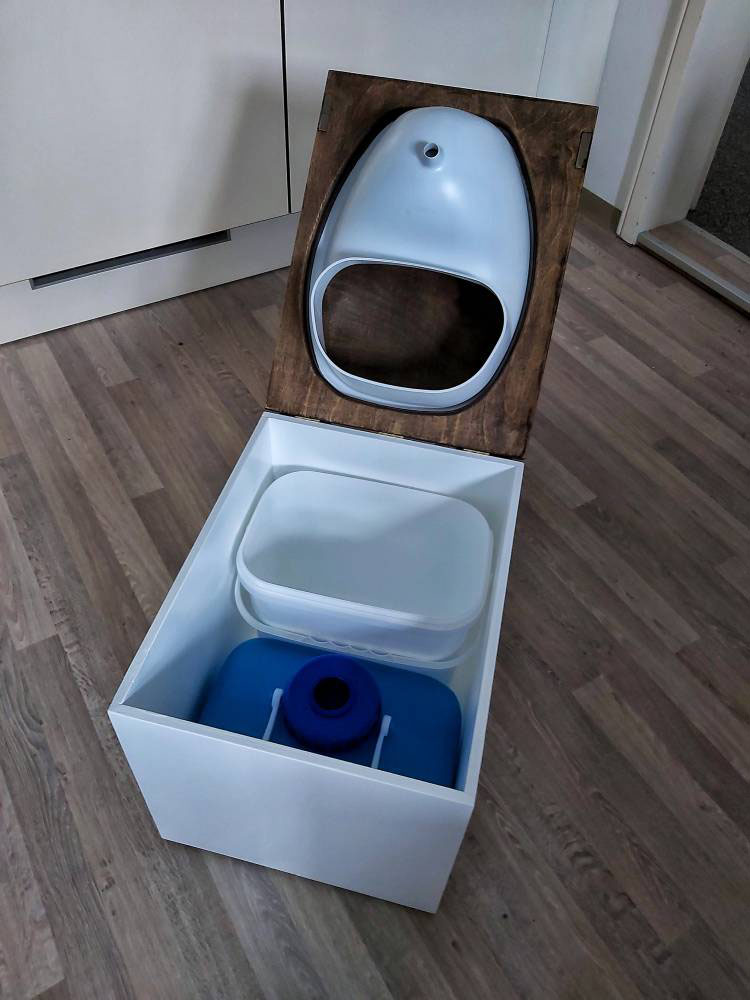
I ordered the separation insert, the solid waste bucket, the urine canister and a bag of litter from
Trelino. Once the order had been
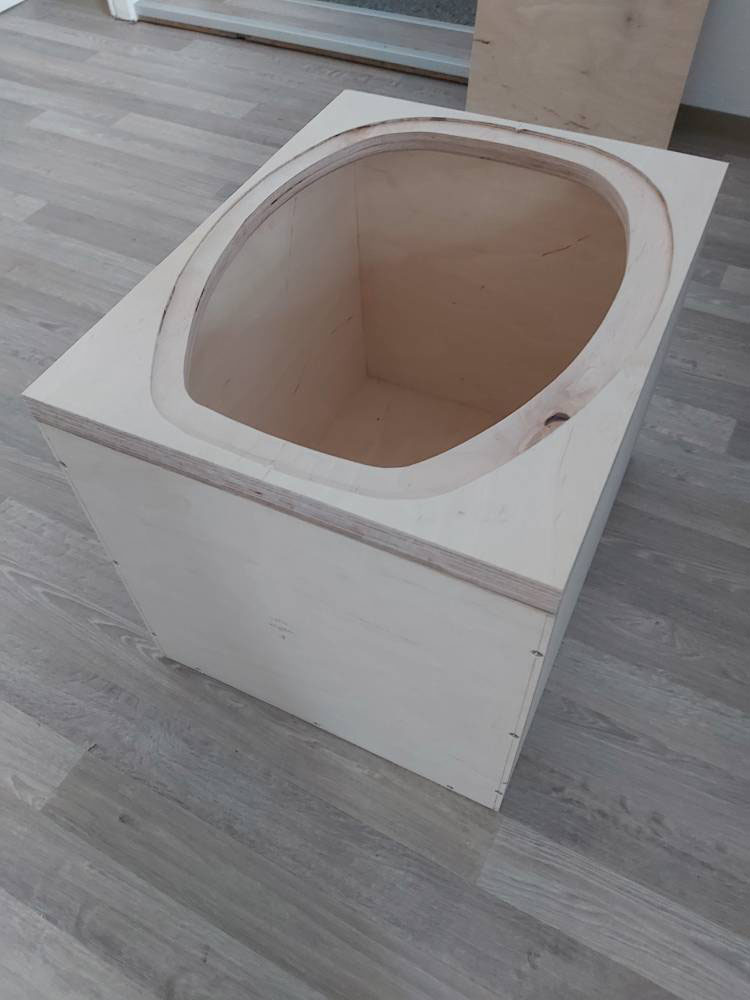
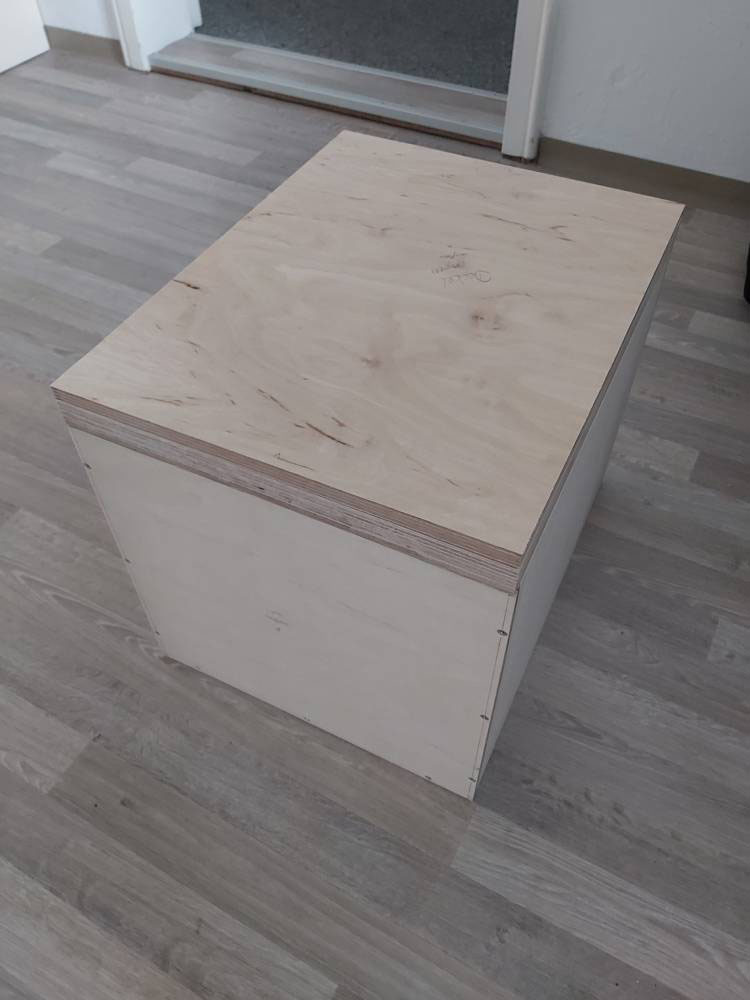
delivered promptly, I was able to take the exact measurements and build the main body. I placed particular
emphasis on keeping the dimensions compact and decided against including a toilet seat. To make it easy to use,
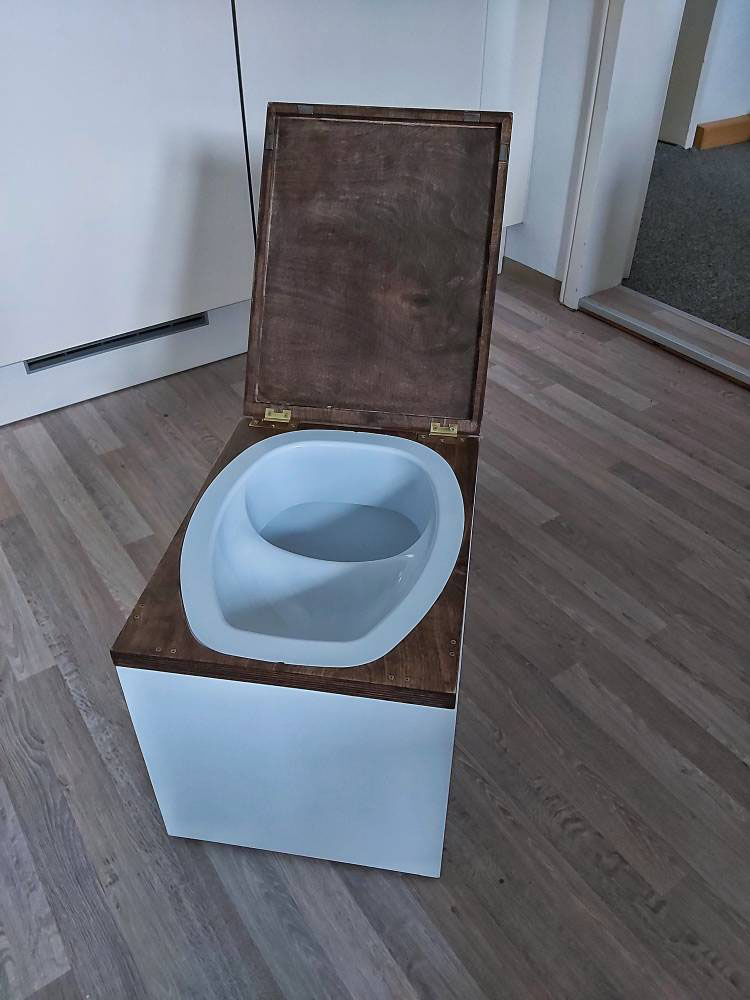
the separation insert was integrated into a folding seat, allowing access to the containers. To finish off, I
fitted a lid to my dry separation toilet.
The new router was essential, particularly for the seat with the separation insert. I'm sure I could have
managed the cut-out with a jigsaw. However, to ensure the separation insert didn't rest on top but fitted
neatly, it was also necessary to create a rim around the cut-out, approximately 2mm deep. This would have been
impossible without a router.
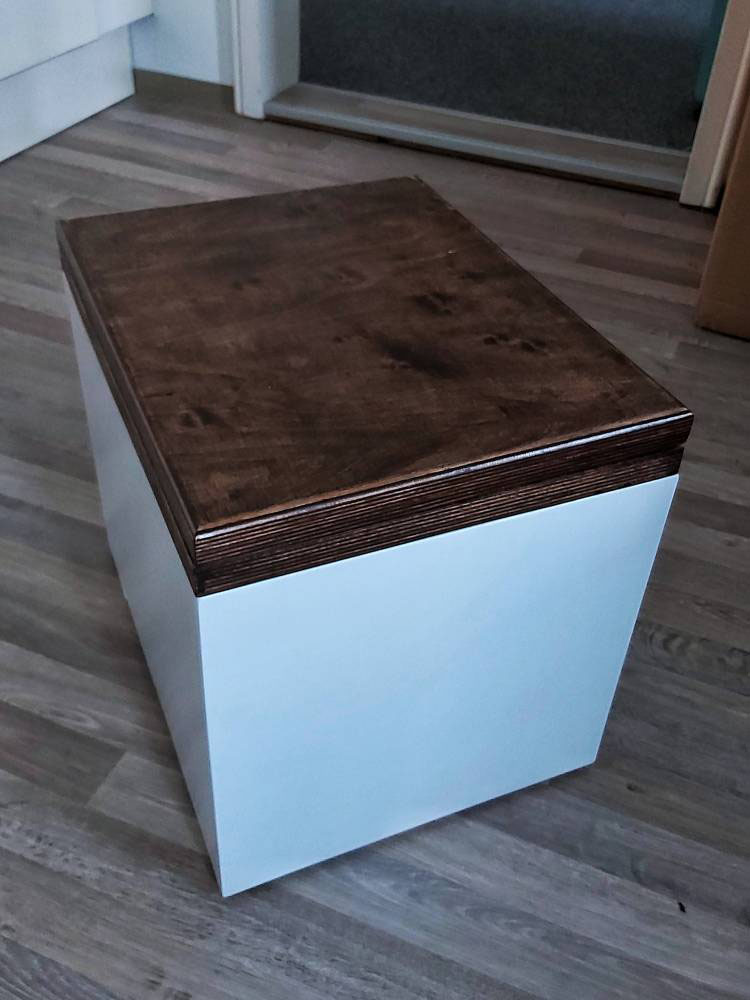
As the dry-separation toilet can also serve as an emergency seat, I opted for a paint that was as robust and
weather-resistant as possible. After the primer, I applied two undercoats and, to finish, two topcoats. The lid
was treated with a high-contrast stain and a single-component clear varnish.
I was very pleased with the result.
The Auxiliary Battery (LiFePO4)
Next came the auxiliary battery. After doing some research, I opted for a lithium iron phosphate battery - LiFePO4
for short. The advantages over lead-acid batteries are lower weight, higher power density, better energy
efficiency and greater cycle stability. For example, LiFePO4 batteries achieve 2-3 times higher capacities for the
same size. Lead-acid batteries may only be discharged to a maximum of 50%. LiFePO4 batteries, on the other hand,
can be discharged up to 90%. Lead-acid batteries can generally only be recharged around 1,000 times. LiFePO4
batteries usually have 5,000-10,000 charge cycles. As I wanted to be as self-sufficient as possible when
travelling in the camper van, the auxiliary battery had to have the highest possible capacity, and this capacity
had to be usable.
I had repeatedly seen videos on YouTube where YouTubers had built their own auxiliary batteries. Of course, they
hadn't built the battery itself, but had assembled an auxiliary battery from several LiFePO4 cells. This
looked quite complicated from a technical point of view, but was always well explained. As ready-made batteries
from Germany are quite expensive and the technology originates from China anyway, I ultimately decided on the
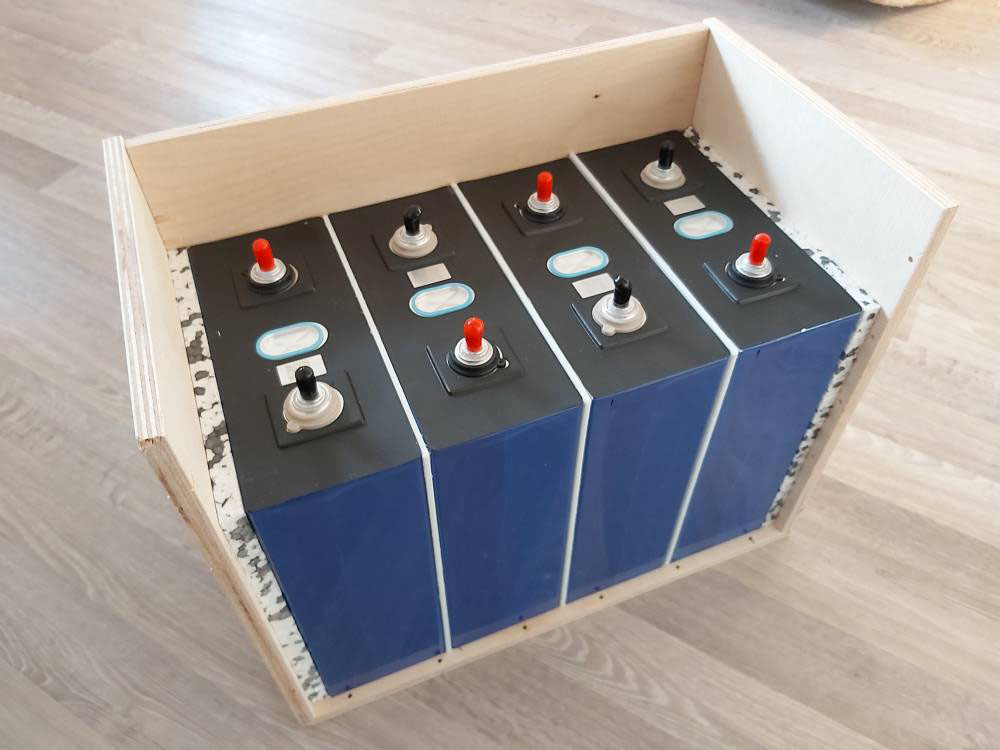
modular system as well. I ordered the individual components for a
12V, 280Ah LiFePO4 battery via AliExpress.
Delivery from China was surprisingly quick, so I could have started the assembly straight away. Unfortunately, the
battery management system (BMS). was still
missing. This was due to be delivered from England and was held up at customs for quite some time.
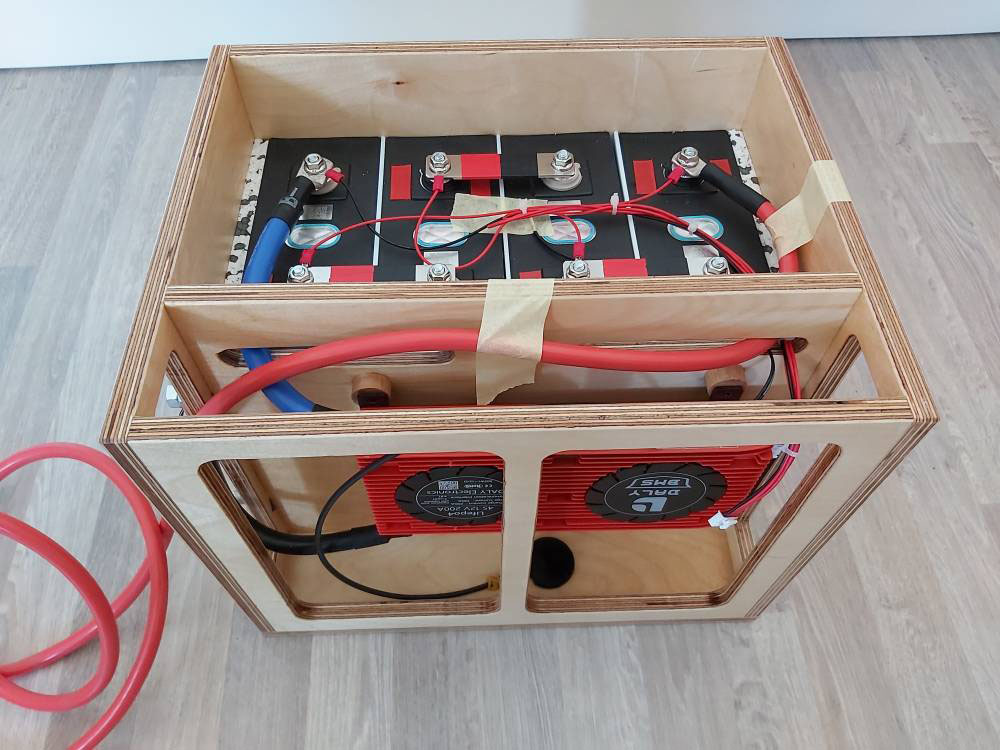
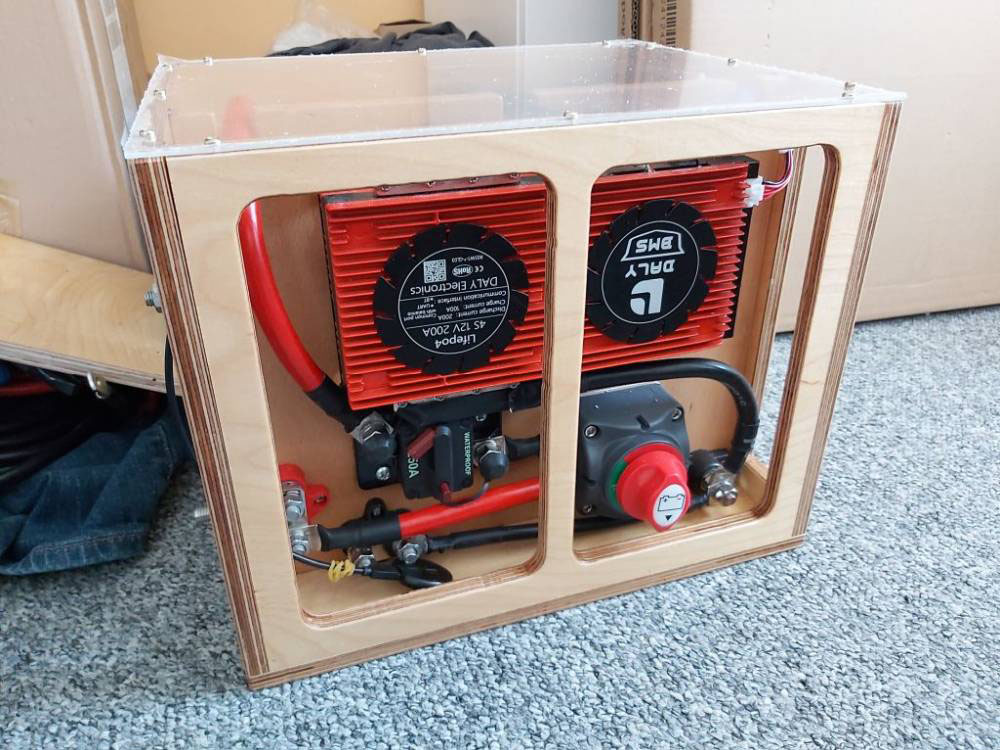
Once all the components had finally arrived, I set about the assembly. I made a housing from 12mm beech plywood to
house the LiFePO4 cells. The BMS, the main fuse and the battery switch, including the wiring, were mounted at the
front end. This was followed by the wiring of the cells and the connection of the BMS. In the end, I had a compact
auxiliary battery that can be connected to and disconnected from the van's electrical system at any time
without any major problems.
Comments
Write a comment
Your email address will of course not be published.