

06 - Floor & Insulation
Once all the rust spots in the interior had been treated and the floor panel was gleaming with a fresh coat of
paint, it made sense to fit a floor to provide a level surface on which to position the individual “pieces
of furniture”.
The floor panel was unsuitable simply because of the longitudinal grooves. Furthermore, the base vehicle needed to
be fitted with insulation to create a comfortable interior climate. It is important to ensure that the insulation
is adequately protected from damage. However, as the interior fittings must be securely fastened - a matter of
load securing - the floor structure had to be supplemented with a floor panel anyway.
Let's start with the insulation:
Here, my knowledge from my civil engineering studies came in handy. I knew what matters when it comes to
insulation and how to evaluate the individual parameters, such as thermal conductivity and vapour diffusion
resistance. Nevertheless, there was a problem for me. From a building physics perspective, insulation should
always be installed on the outside. Why this is the case, however, is not the subject of this website.
Consequently, it was not possible to simply buy and install standard insulation. Especially as, depending on the
quality, considerable insulation thicknesses would be required. For a house, this is usually 20 cm or more. So I
had to look online for alternative options. As converting a camper van is nothing out of the ordinary, you can
quickly find all the information you need here.
Yes, insulation using natural products such as hemp and sheep's wool is mentioned, as is the use of
polystyrene and glass wool. However, one product is used particularly frequently. This is probably due to its
combination of properties.
It has very low thermal conductivity, resulting in high insulation performance. Furthermore, its vapour diffusion
resistance is high and the product does not absorb moisture. Furthermore, the product is also available in a
self-adhesive version, which significantly improves installation.
Consequently, I too opted for the Armaflex XG product from
Armacell in a 19mm thickness. I also
purchased Armaflex adhesive tape to provide minimal insulation for struts and similar components. Aluminium-coated
adhesive tape was added for the joints.
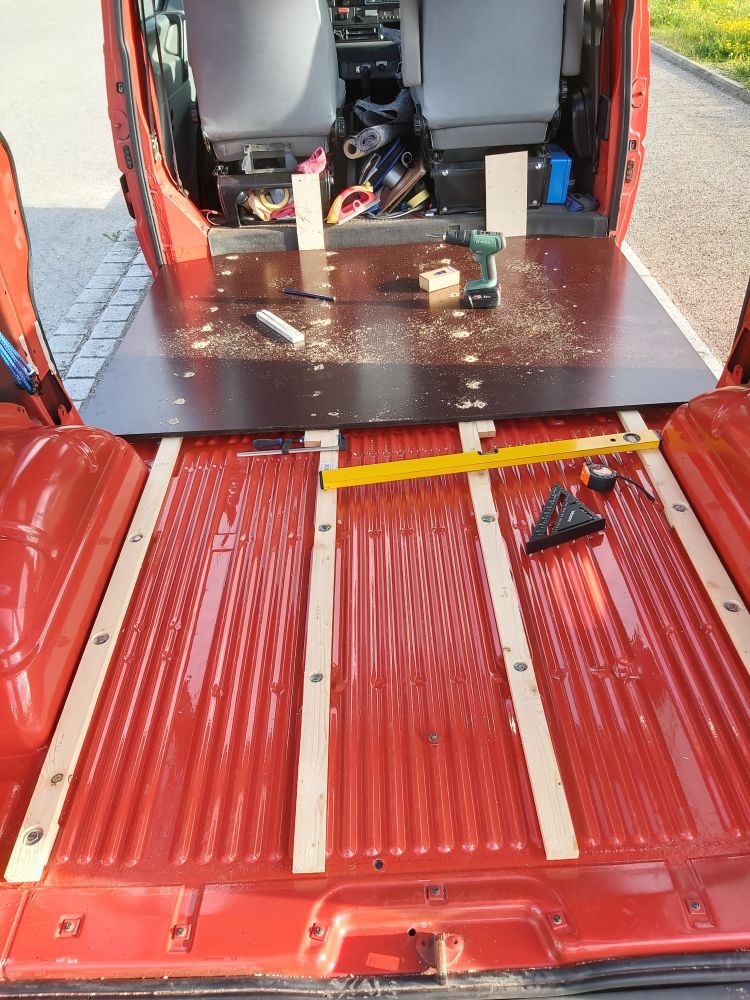
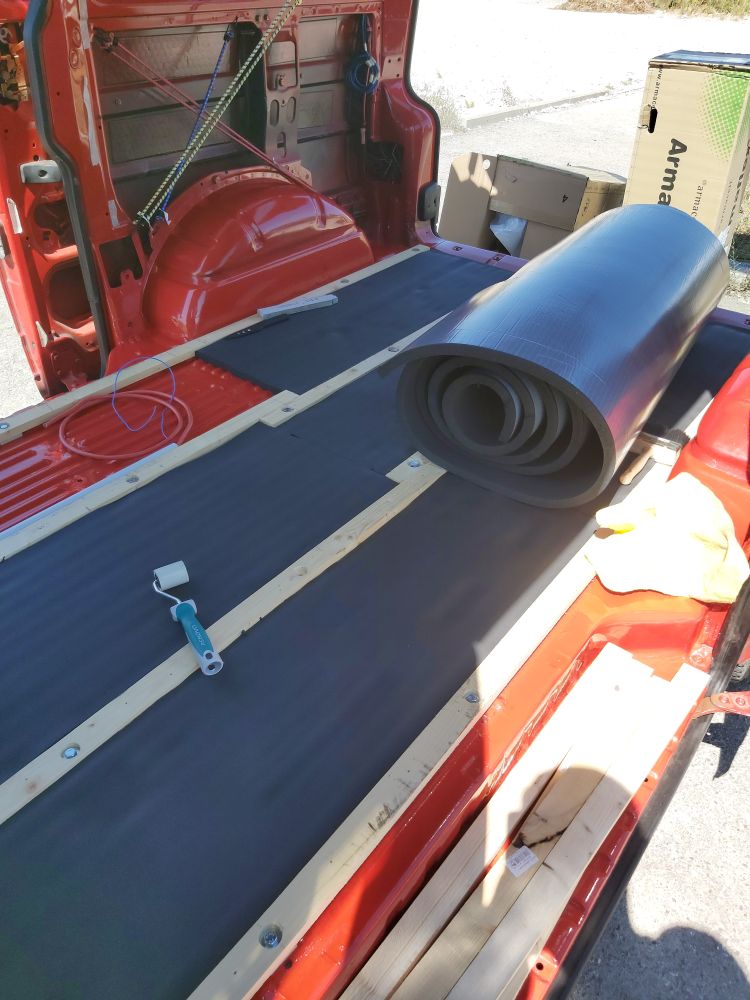
To ensure the floor panel could later be securely attached to the bodywork without damaging the insulation, a
framework of battens had to be installed first. Simple roof battens were used for this, which were screwed to the
floor panel using rivet nuts. The spaces between the battens could then be filled with insulation, and finally the
floor panel was laid in place and firmly screwed to the framework.
It actually sounds quite simple, but it still took quite some time if you want to do everything on your own
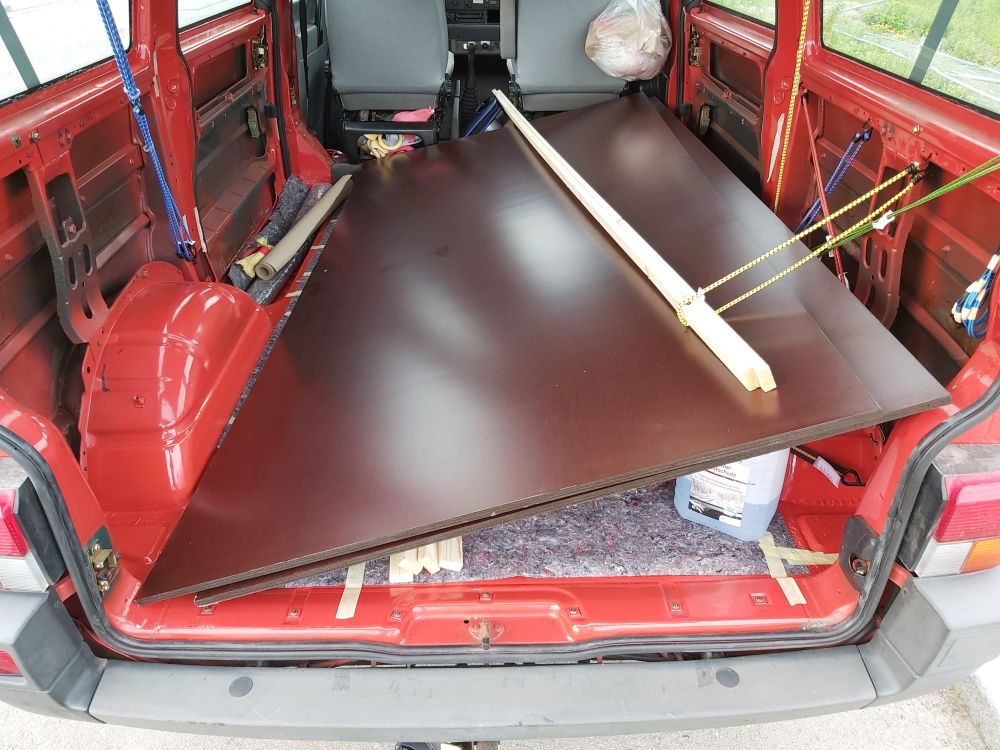
Cutting the base plate to size was particularly laborious. I used 18mm-thick screen printing plates for this.
These are very rigid and waterproof thanks to their coating. Unfortunately - or perhaps fortunately - the plates
weren't available in the right size. So I had to buy two and put up with a fair bit of waste. On the other
hand, even these sheets were extremely unwieldy and heavy, so I had a right struggle to heave them into the
van.
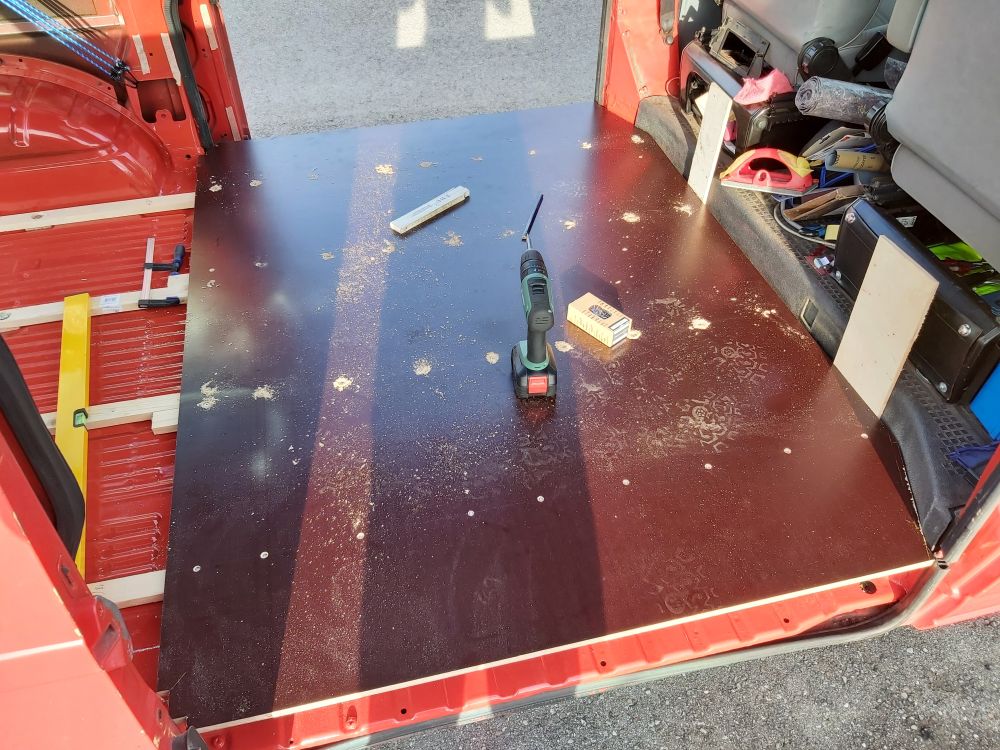
This was also quite a hindrance when it came to working on them. It was only once I'd at least cut the sheets
to length that the work became a bit easier. However, adapting the sheets to the contours of the floor took a lot
of time. I had to keep taking measurements and adjusting the sheets.
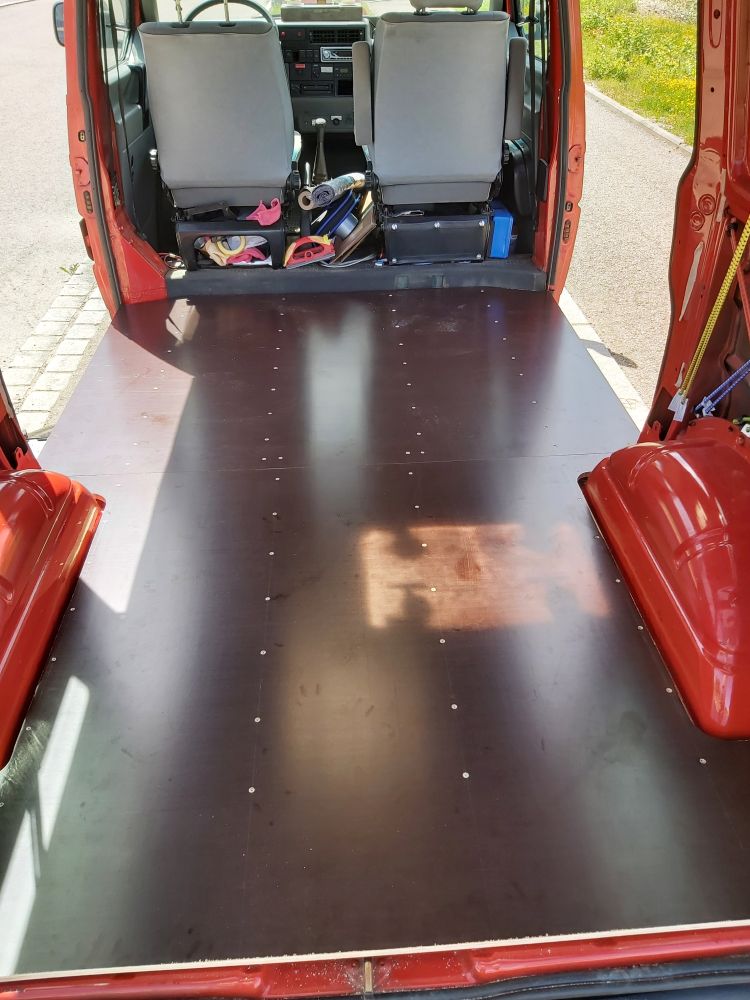
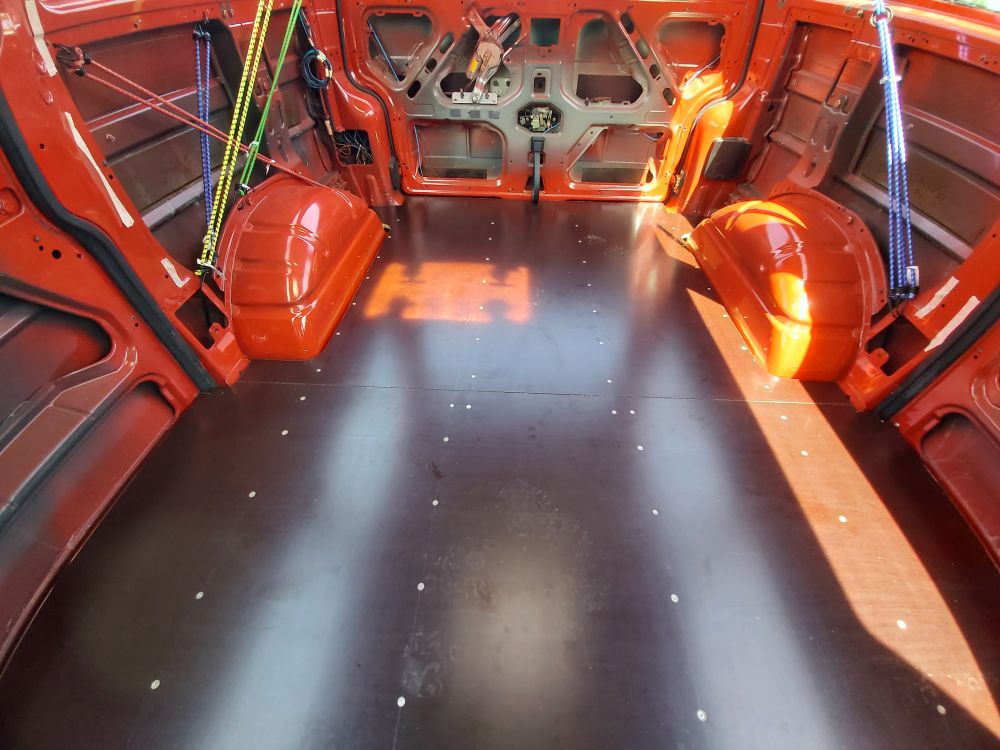
Once the panels had finally been cut to size as required, the screw holes could be pre-drilled and the panels
screwed into place. In the end, I was very pleased with the result.
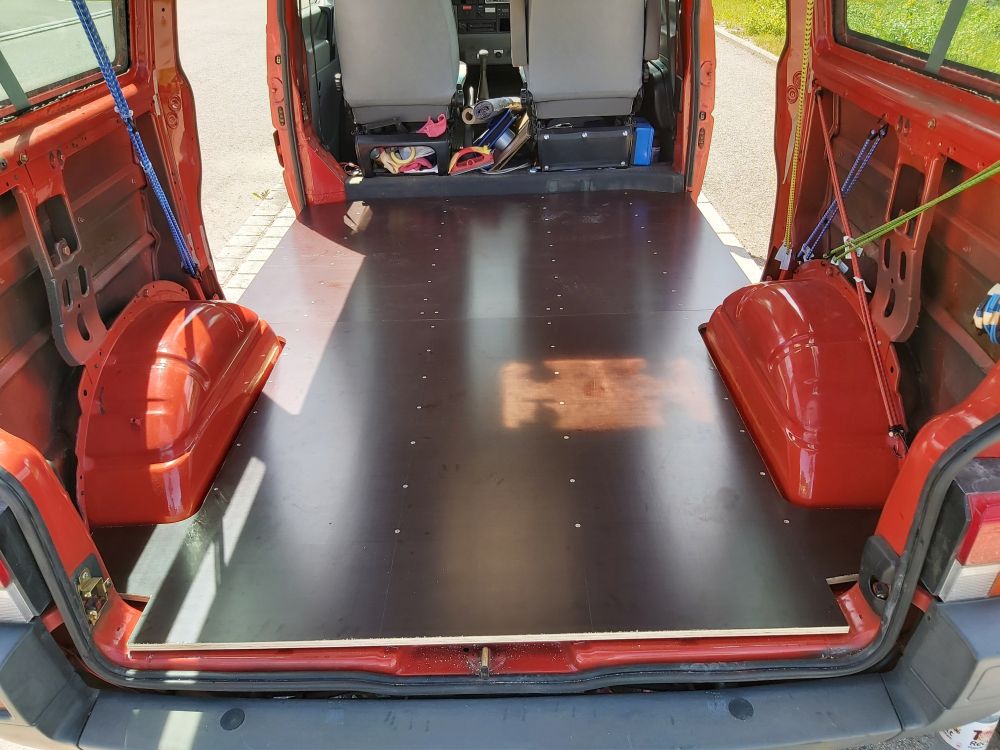
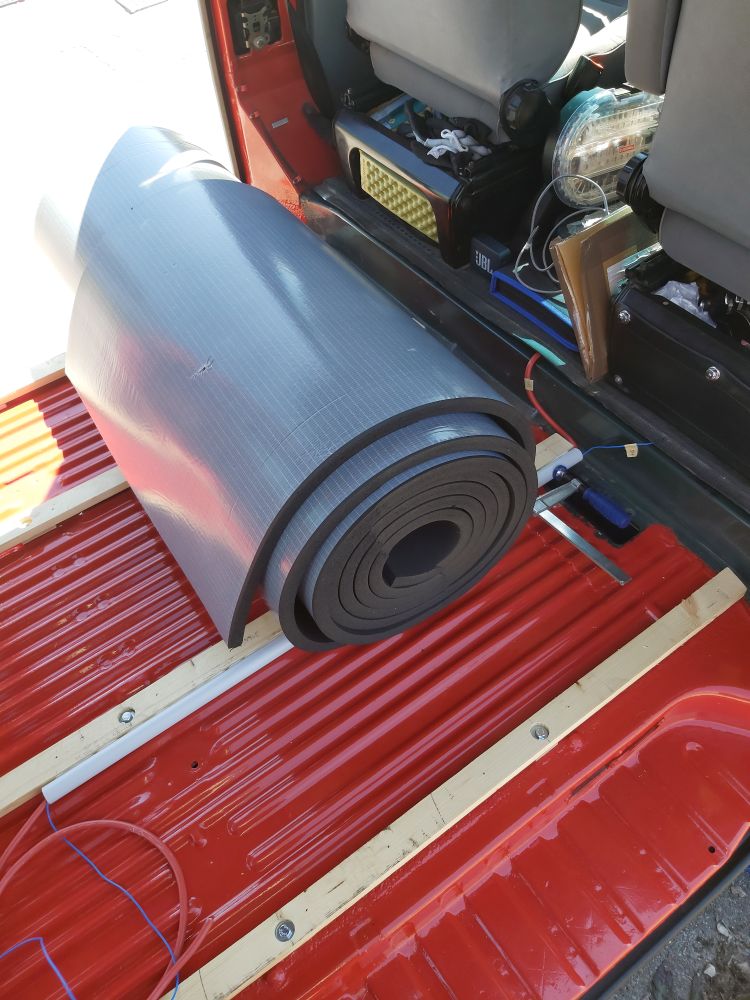
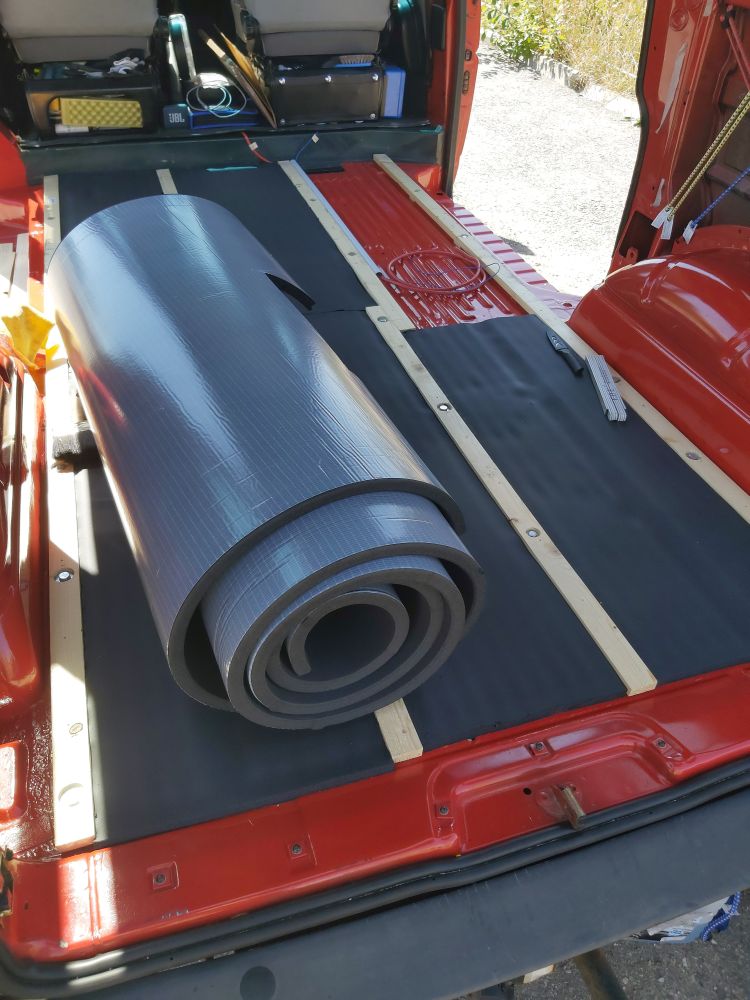
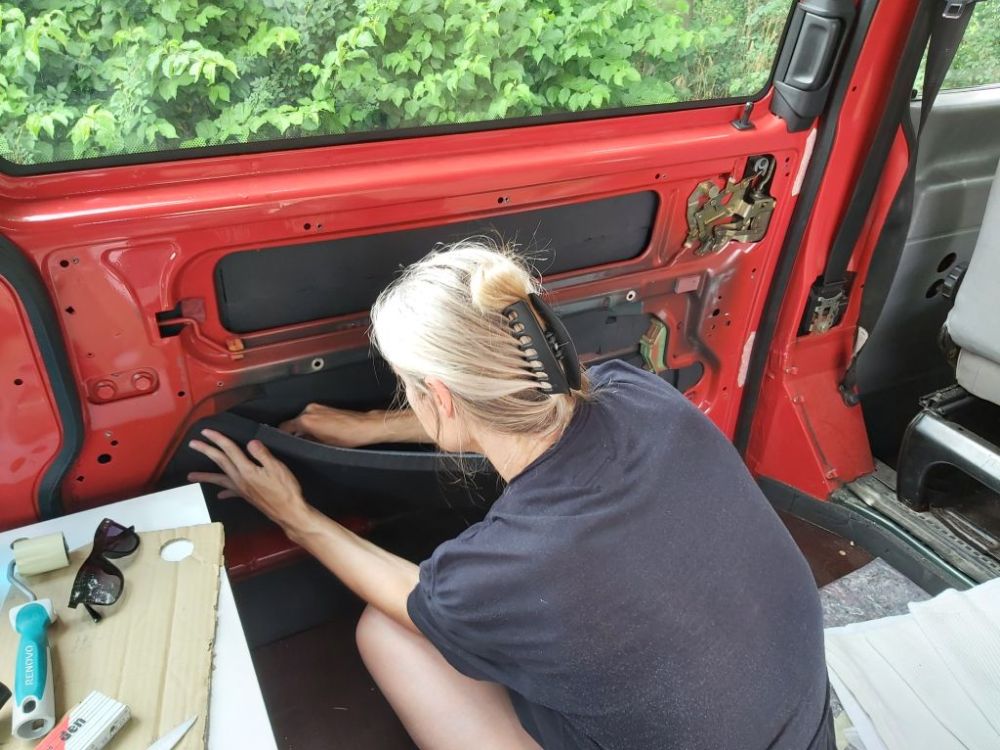
Now that the floor panels had been fitted and were no longer causing a mess, I could move on to insulating the
floor. The insulation is supplied in rolls and can be easily cut to size with a ceramic knife. Thanks to its
flexibility, the insulation then moulds itself to the shape of the substrate.
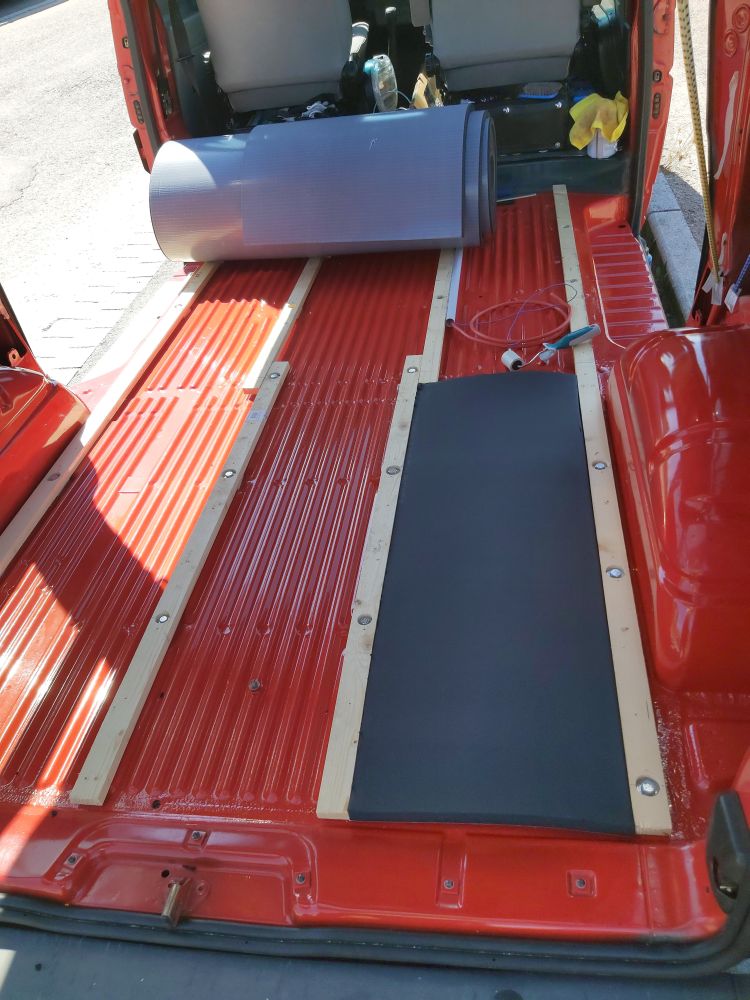
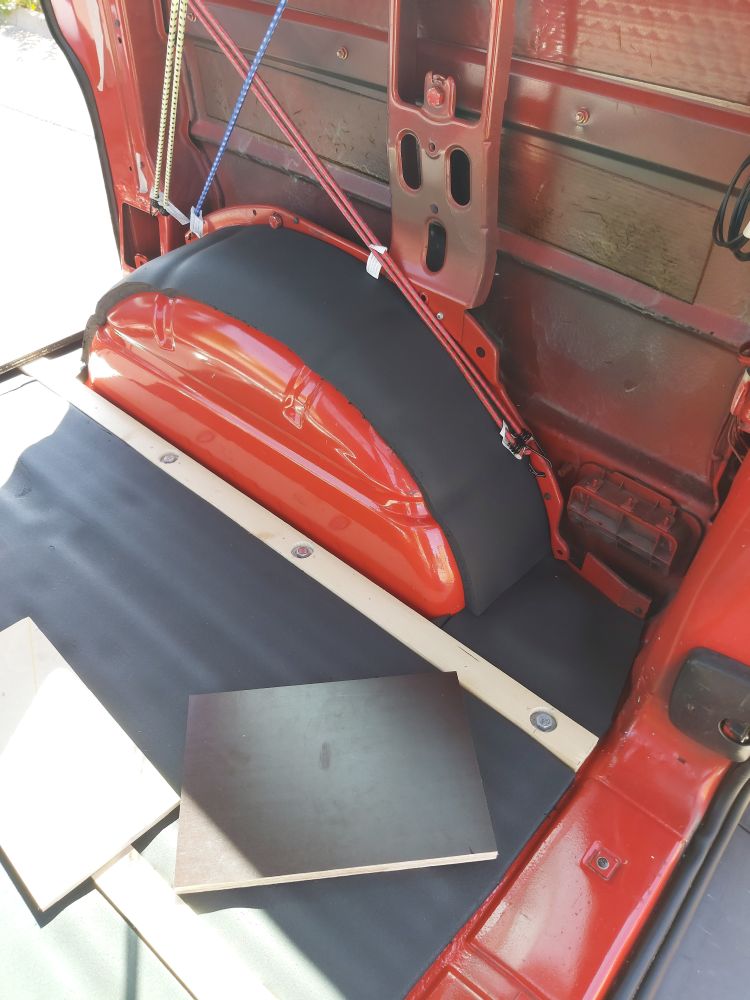
Before bonding, however, the surface should be thoroughly cleaned to ensure good adhesion. When applying the
adhesive, you should proceed section by section. First, remove the protective film from just one side or corner,
align it properly and press it down. Then the protective film can be peeled off bit by bit and the insulation
carefully glued in place.
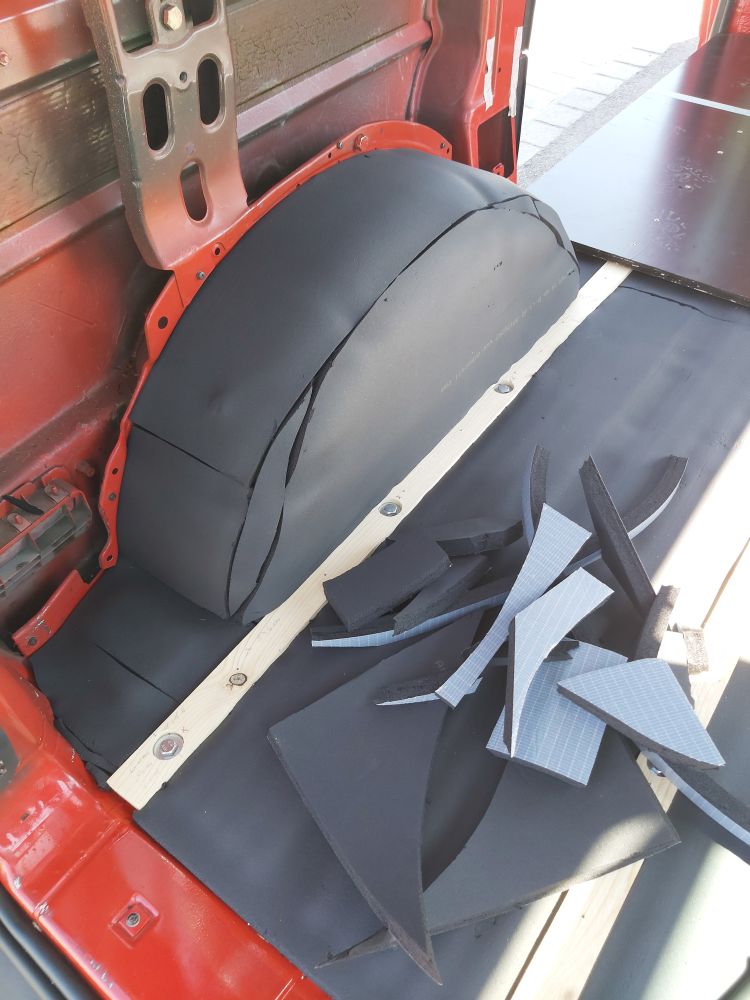
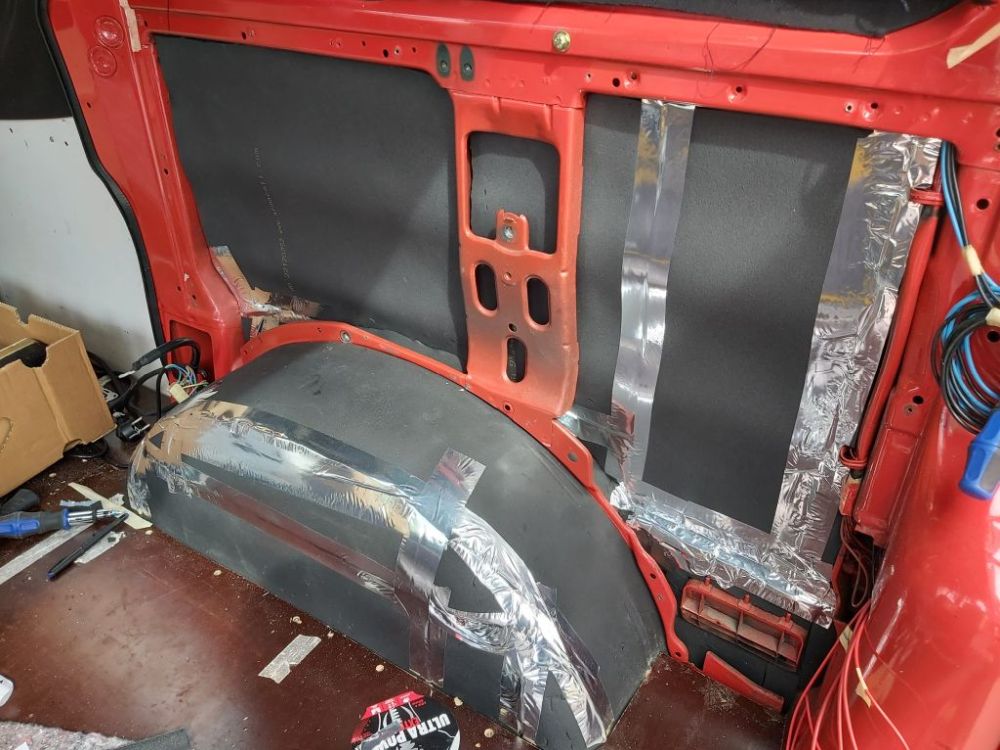
You should also ensure that no gaps remain between individual pieces. If necessary, these should be filled with
offcuts. Finally, cover the joints with aluminium-backed adhesive tape to prevent moisture from penetrating at
these points, and the floor insulation is complete.
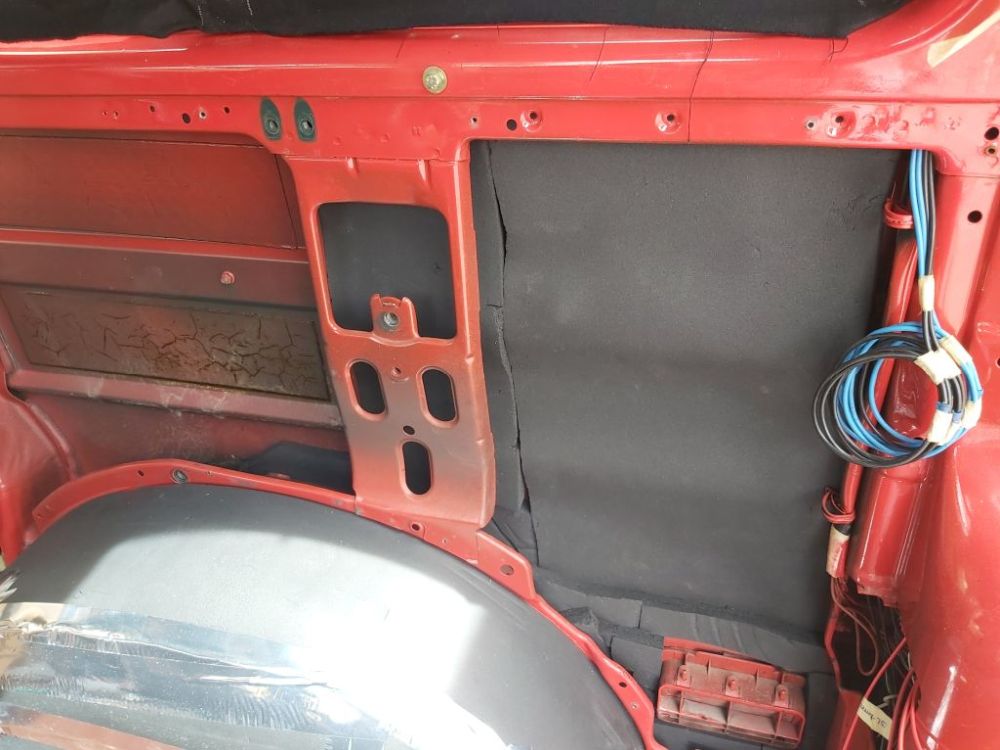
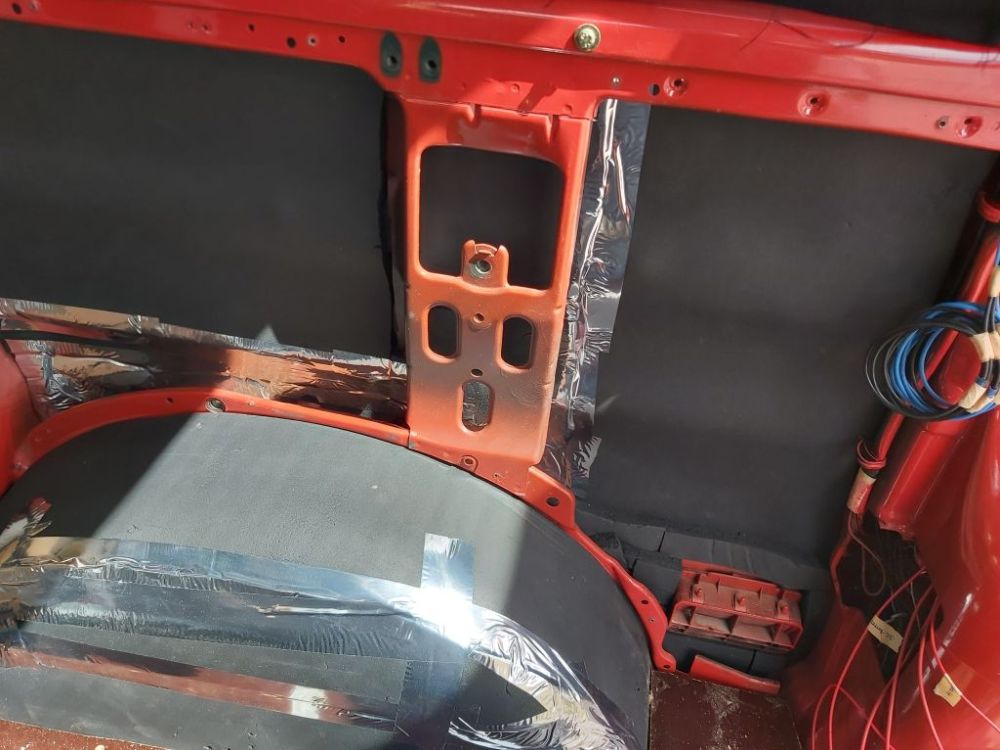
The floor is now insulated and a level surface has been created for the interior fit-out. All that was missing now
were the side walls, doors and the roof. As I wasn't yet sure whether to stick the insulation to the metal
sheet or perhaps to the panelling instead, this was put on hold for the time being.
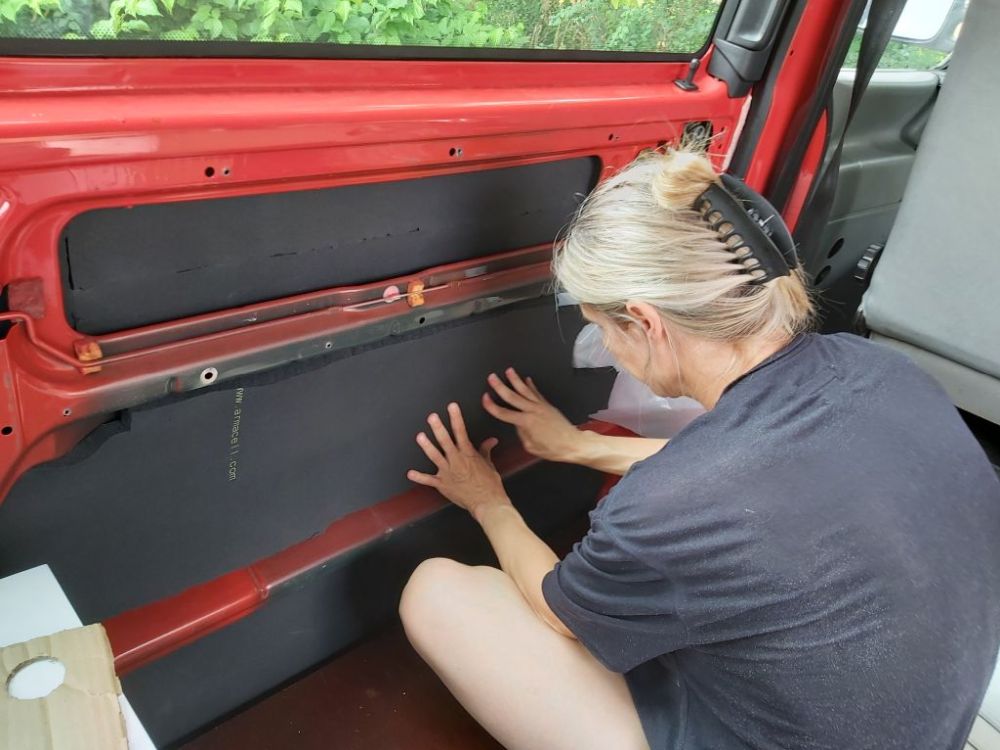
It was only when Andrea joined me that we got down to work. Given the numerous struts, her smaller hands proved to
be an advantage here. Furthermore, the struts turned out to be so sturdy that two layers of insulation could be
applied at once.

The floor and insulation are in place. At last, it was possible to take precise measurements for the furniture. To do this, I marked a centre line on the floor panel and a transverse line 1.80 m from the stern. All measurements were subsequently taken from these lines.
Comments
Write a comment
Your email address will of course not be published.